Wednesday, April 17, 2013

I Love Going...All Nighter!

Today we're going to discuss makeup setting spray, and all the reasons I am obsessed with it.  More specifically, Urban Decay's All Nighter Long-lasting Makeup Setting Spray. 


Number one, Urban Decay is one of my favorite cosmetics brands and I trust all of their products to not rip my face off (this actually happens, if it's not high quality, my face WILL fall off).  When my face is still attached, every time I play with UD, my love for the brand grows and grows.  Primers, shadows, Lip Junkie glosses, Naked Skin foundation, Naked Flushed cheek palette, Super Saturated Lips, Razor-sharp Powder...all my loves.

Number two, it is so amazingly easy to use a setting spray.  In general, after your makeup is applied, close your eyes and spray a quick "T" and "X" across your face to keep your makeup looking at the end of the night like it did when freshly applied.  Seriously, this happens...it's amazing.  UD makes three different setting sprays for different skin types: De-Slick for oilier skins, All-Nighter for normal to combination skins, and Chill for drier skins.  I said "in general" before re: application because the De-slick can also be applied to clean skin prior to makeup application to help control oil throughout the day.  How great is that?!?!?!? 

Number three, All-nighter isn't just for setting your makeup anymore.  I use it to wet my shadow brush before I apply my eye shadow to not only give the great pigment payoff of using a wet brush, but also to stick that shadow to my lid like my glue gun sticks rhinestones to EVERYTHING!  Picked up this amazing trick from UD makeup artist, Christopher Allgeier (he's fab).  I die for eye shadow and can't even handle the fabulousness of learning ways to wear it differently!!  UD shadows are incredible anyway, but applying them this way is like transforming a CZ into a diamond! 

One last final tip, I'm not saying this, but if you happen to have some cheap shadows hiding in a box where no one else can see them, wetting your brush prior to application will give you the best pigment payoff possible.  That is a tongue twister if ever there was one...and I used the term "pigment payoff" twice in this post...I don't know how I feel about that. 


A Very Fabulous Recipe: Rotel Dip

I'm back...I know it's been a while.  I sincerely hope you weren't holding your breath because, if so, you're most likely dead now.  

I thought it would be fun to do a series of recipes!  This is especially hilarious because I should own a mug that says "World's Worst Cook".  I thought I'd share some "recipes" that I can handle and that means you can too!!  One word: ROTEL.

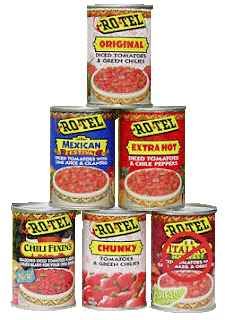
Rotel Pyramid


Up first is Rotel Dip, yes, I'm very fancy, I know.  Last night I was feeling extra ambitious and added sausage to a pan BEFORE I added Velveeta and Rotel, ,ooo la la!  Get ready for fabulous everyone!!

Ingredients:

  • 1 box Velveeta (full fat, it only has five grams, as opposed to three in the low-fat, which isn't much difference and tastes much better)
  • 1 can Rotel (buy the store brand of diced tomatoes with chilies, it tastes the same and is much cheaper, you're welcome)
  • light pork sausage (go ahead and get the light, we want to keep it healthy with the Rotel and chips here, right kids?)
  • one bag, tortilla chips (I like the "Hint of Lime"...basically lime flavored Doritos...yum)

Directions:

Cook the sausage, make sure it's not pink anymore (this is very important).  Pour the sausage onto a plate covered in paper towel to soak up extra grease.  Throw away sausage pieces you spilled that didn't make it on to plate.  Place remaining 80% of sausage back in pan (that's probably all you'll have left).  Add block of Velveeta to pan and melt (you can clean up what you splash out of pan later...or not).  Lastly, open can of Rotel, drain, and put contents of can in pan.  Stir.

Dip chips in, well, the dip, and enjoy this fabulous recipe!!

Tuesday, January 22, 2013

Brows for the Win

Recently brows have become my favorite thing on my face.  Forget the eyes, nose, or lips, brows are where it's at.  Hollywood has given us some amazing examples of Brow Divas over the years: Katherine, Liz, and Audrey being my personal favorites...am I right??


Recently, brows have begun to make a comeback and I couldn't be more thrilled!!  New Brow Divas like Megan Fox and Kate Upton are giving us some brows to keep our eyes on!


Let's start with the shape of the brow.  The rule used to be that the brow should start directly up from the inside corner of the eye and should stop at a 45 degree angle away from the outside corner.  But brows are getting longer...slightly.  Don't get crazy, I'm not backing a uni-brow here, just saying that keeping the brow a little longer on the outside gives the face a softer, more romantic look.  Also, a soft arch is a gorgeous shape...mimicking, but just short of the arch of the ocular bone.  Lastly, don't get those babies too thin, we don't want to look like we're from south Texas.  

Once you have your shape down, it's time to define.  It's amazing what a difference defining the brow makes in the overall appearance of the face.  Get thee to a retailer of fine eyebrow pencils.  My two favorites are the Anastasia Brow Wiz because it has an incredibly fine point and has a large selection of colors and the Smashbox Brow Tech to Go because, although it only comes in two colors, it has an angled roll-up tip and setting gel.  There are other brow products on the market, powders and gels, but I prefer a pencil to get the Megan Fox/Kate Upton brow.  Choose a color the shade of your natural brow or slightly darker...again, we're not aiming for south Texas brows.

Anastasia Brow Wiz...note the spoolie on the bottom

Start by outlining the top and bottom  on the inner half of the brow, literally draw a line on the top and bottom, now fill in between those lines with short, hair like strokes.  Now draw a line enclosing the inside of the brown.  None of this should be harsh...light lines but enough to give you definition, you can go a little heavy here if you want to, we're going to lighten it up later.  Quick tip: stand back from the mirror when you're doing this, if not, when you do step back you're more likely than not going to have two giant caterpillars drawn on your face.  Next, take your pencil and, with those same short hair-like strokes, fill in the outer half of the brow.  This part doesn't have to be as rigidly defined but does need to be well filled in.  Finally, take a spoolie (the brush that looks like a mascara wand) and brush through the brow, from the inside-out.  This not only keeps the hairs in place, if you bear down on it it will distribute the product and give your amazing brows the perfect finishing touch.

Voila, you now have perfect brows.  Wear them with fabulosity!!